Difference between revisions of "Wind Farm Guide"
m (Locally host images) |
(Make Z/X part look more like it was written by one person.) |
||
| (3 intermediate revisions by 2 users not shown) | |||
| Line 1: | Line 1: | ||
== Summary == | == Summary == | ||
| − | * How-to: Select a builder, pick a windgen from the build list, hold | + | * How-to: Select a builder, pick a [[Wind/Tidal Generator|windgen]] from the build list, hold {{key combo|Alt|Shift}}, draw a rectangle. |
* Build them on mountains in the rear of the map. | * Build them on mountains in the rear of the map. | ||
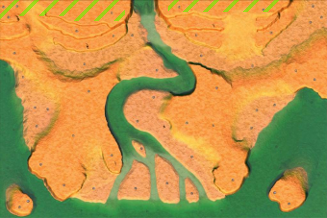
[[File:Windfarm.png]] | [[File:Windfarm.png]] | ||
| − | |||
| − | |||
| − | Now select a builder and pick wind generator from the build list. Hold down | + | == How to build a windgen farm? == |
| + | Now select a builder and pick wind generator from the build list. Hold down {{key press|Alt}} and {{key press|Shift}}, then click and drag a rectangle with your left mouse button. It will be filled with wind generators. | ||
| − | + | You can adjust spacing using {{key press|X}}/{{key press|Z}} while drawing the rectangle. Use {{key press|Z}} or {{key press|X}} to choose how many tiles of space you want to use between wind generators. {{key press|Z}} increases by 1, {{key press|X}} decreases by 1. By default, spacing is set to be 2 tiles. The more space you use, the less damage your wind generators deal to adjacent ones when they explode. Use one or two tiles if you are low on space, otherwise three is a good number. The maximum spacing should be four tiles—any bigger and wind generators are not linked to a single grid. Ground builders cannot move through windgen farms if you use one tile of space, and they will have trouble finding a path if you use two. | |
| − | == Where to build a windgen | + | == Where to build a windgen farm? == |
[[File:Wind placement.png|right]] | [[File:Wind placement.png|right]] | ||
| − | Wind generators produce | + | Wind generators produce [[Energy]] based on global wind '''strength''' and local wind '''range'''. |
| + | * Wind '''range''' is based on altitude. Higher altitudes increase the minimum but not the maximum number. This means that wind generators on hills and mountains have a minimum range higher than 0. If you don't want to spend too much time figuring out whether or not to build wind generators, a simple rule could be: Make sure the minimum wind strength in the placement tooltip is close to or above 1. | ||
| + | * Wind '''strength''' is a number that randomly goes up and down over time. The minimum means the lowest range number on each wind generator is used, the maximum means they produce a full 2.5 Energy. | ||
| − | + | Wind generators are fragile. They have very few hit points. This means that big farms of wind generators require a safe place—often the rear of your team's starting box. However, very high altitudes can be reason enough to risk building them on mountains closer to the enemy. | |
| − | + | Sufficiently high minimum wind strengths make wind generators ''more'' cost efficient than [[Fusion Reactor|Fusions]], [[Geothermal Generator]]s, in rare extreme cases [[Singularity Reactor|Singularities]] and even [[Advanced Geothermal]]s! | |
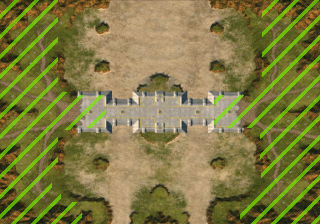
| − | + | ===Locations perfect for windgen farms=== | |
| − | + | <gallery heights="230px" mode="packed" style="background-color:transparent"> | |
| + | Wind placement Escarpment.png|Rear high ground on [http://zero-k.info/Maps/Detail/7380 Escarpment]. | ||
| + | Wind placement Tempest.png|Rear mountains on [http://zero-k.info/Maps/Detail/7874 Tempest] and [http://zero-k.info/Maps/Detail/8142 Tempest Dry]. | ||
| + | Wind placement Tuckedup.png|High ground on [http://zero-k.info/Maps/Detail/8096 Tuckedup]. | ||
| + | Wind placement DeltaSiege.png|Rear and northern spawns on [http://zero-k.info/Maps/Detail/7304 DeltaSiegeDry]. | ||
| + | Wind placement IsisDelta.png|Northern mountain on [http://zero-k.info/Maps/Detail/7521 IsisDelta]. | ||
| + | Wind placement RustyDelta.png|Northern and rear plateaus on [http://zero-k.info/Maps/Detail/7728 RustyDelta]. | ||
| + | Wind placement Folsom.png|Rear on [http://zero-k.info/Maps/Detail/18434 FolsomDamDeluxe] and [http://zero-k.info/Maps/Detail/7421 FolsomDamFinal]. | ||
| + | </gallery> | ||
| − | |||
| − | |||
| − | |||
| − | |||
| − | |||
| − | |||
| − | |||
| − | |||
| − | |||
| − | |||
| − | |||
| − | |||
| − | |||
| − | |||
| − | |||
{{Navbox manual}} | {{Navbox manual}} | ||
[[Category:Strategy]] | [[Category:Strategy]] | ||
Latest revision as of 14:12, 9 October 2021
Contents
Summary[edit]
- How-to: Select a builder, pick a windgen from the build list, hold Alt + Shift, draw a rectangle.
- Build them on mountains in the rear of the map.

How to build a windgen farm?[edit]
Now select a builder and pick wind generator from the build list. Hold down Alt and Shift, then click and drag a rectangle with your left mouse button. It will be filled with wind generators.
You can adjust spacing using X/Z while drawing the rectangle. Use Z or X to choose how many tiles of space you want to use between wind generators. Z increases by 1, X decreases by 1. By default, spacing is set to be 2 tiles. The more space you use, the less damage your wind generators deal to adjacent ones when they explode. Use one or two tiles if you are low on space, otherwise three is a good number. The maximum spacing should be four tiles—any bigger and wind generators are not linked to a single grid. Ground builders cannot move through windgen farms if you use one tile of space, and they will have trouble finding a path if you use two.
Where to build a windgen farm?[edit]

Wind generators produce Energy based on global wind strength and local wind range.
- Wind range is based on altitude. Higher altitudes increase the minimum but not the maximum number. This means that wind generators on hills and mountains have a minimum range higher than 0. If you don't want to spend too much time figuring out whether or not to build wind generators, a simple rule could be: Make sure the minimum wind strength in the placement tooltip is close to or above 1.
- Wind strength is a number that randomly goes up and down over time. The minimum means the lowest range number on each wind generator is used, the maximum means they produce a full 2.5 Energy.
Wind generators are fragile. They have very few hit points. This means that big farms of wind generators require a safe place—often the rear of your team's starting box. However, very high altitudes can be reason enough to risk building them on mountains closer to the enemy.
Sufficiently high minimum wind strengths make wind generators more cost efficient than Fusions, Geothermal Generators, in rare extreme cases Singularities and even Advanced Geothermals!
Locations perfect for windgen farms[edit]
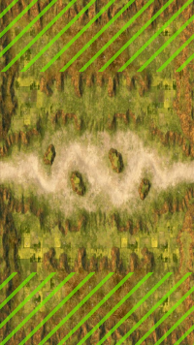
Rear high ground on Escarpment.
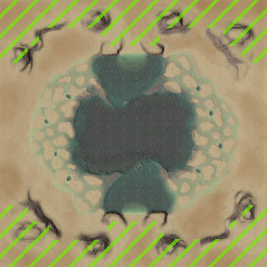
Rear mountains on Tempest and Tempest Dry.
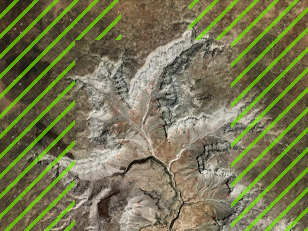
High ground on Tuckedup.
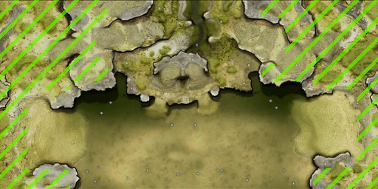
Rear and northern spawns on DeltaSiegeDry.
Northern mountain on IsisDelta.
Northern and rear plateaus on RustyDelta.
Rear on FolsomDamDeluxe and FolsomDamFinal.


| Basics | |
|---|---|
| Units | |
| Unit abilities and features | |
| Other features | |
| Other information | |
| Strategy | |
| Development/Modding | |