Difference between revisions of "Overdrive"
m (Fixed typo, added F4 mention. Don't ask how i ended up here.) |
(Made formulas a little more readable for non-programmers. Hopefully didn't mess them up in the process.) |
||
| Line 1: | Line 1: | ||
| − | '''Overdrive''' is an ability of [[Metal Extractor]]s that allows them to drain [[energy]] to | + | '''Overdrive''' is an ability of [[Metal Extractor]]s that allows them to drain [[energy]] to increase their [[metal]] income. It uses a grid mechanic that is also required by some powerful defense structures to function. |
| − | = Summary = | + | == Summary == |
| − | * To view your energy grid turn on the economy screen by pressing F4 (by default) or switching it in the top-left | + | * To view your energy grid, turn on the economy screen by pressing {{key press|F4}} (by default) or switching it in the top-left corner by clicking the <samp>[[File:metalmap.png|text-top|green sphere]] Toggle Economy Display</samp> icon. |
* Circles around metal extractors and energy sources show their grid influence. | * Circles around metal extractors and energy sources show their grid influence. | ||
* Structures are in the same grid if their circles overlap. | * Structures are in the same grid if their circles overlap. | ||
| − | * The unused energy income in a grid is sent to the connected Metal Extractors to | + | * The unused energy income in a grid is sent to the connected Metal Extractors to increase their income. |
* Grids between allies can be connected. | * Grids between allies can be connected. | ||
| − | * The more energy a Metal Extractor uses, the less efficient | + | * The more energy a Metal Extractor uses, the less efficient the overdrive will be. |
| − | * Some weapons ([[Lucifer]], [[Desolator]], [[Cerberus]]) need a certain | + | * Some weapons ([[Lucifer]], [[Desolator]], [[Cerberus]]) need a certain amount of grid energy to function. |
| − | == Grid Expansion == | + | === Grid Expansion === |
| − | * If a grid is pink or violet | + | * If a grid is pink or violet—Make sure you have some excess energy and connect Metal Extractors and energy structures together. |
| − | * If a grid is light blue or green | + | * If a grid is light blue or green—Keep adding energy. |
| − | * If a grid is yellow or red | + | * If a grid is yellow or red—The grid is inefficient. Spread out the energy by expanding the grid to connect more Metal Extractors. |
| − | |||
| − | |||
| − | |||
| − | == | + | == Explanation of Overdrive == |
| − | The energy | + | The energy grid consists of your energy structures, [[Energy Pylon|pylon]]s, and metal extractors (''[[Metal Extractor|mexes]]''). Each mex and energy structure has an effect field; two structures are linked if their effect fields overlap. Linking economy structures together creates a grid; the energy produced in the grid is the maximum energy that can be used to overdrive all the mexes in the grid. |
| − | + | === Energy Distribution === | |
| + | The energy available to overdrive is dependent on a team's energy storage, income and expenditure, according the following formula: | ||
| − | + | <!--<code>Energy for Overdrive = (income - expenditure) * (storage / capacity)</code>--> | |
| + | <var>Energy for Overdrive</var> = (<var>income</var> - <var>expenditure</var>) × (<var>storage</var> / <var>capacity</var>) | ||
| − | + | A team with full energy storage spends all of its excess energy on overdrive. Overdrive always costs energy, and does not occur if a team's expenditure exceeds its income. All the available energy is spent provided that there are sufficient grid connections. The total energy used by the metal extractors of a grid can never exceed the overdrive capacity of a grid. The total overdrive capacity of a grid is the summed energy income of each structure in that grid. | |
| − | Overdrive | ||
| − | + | === Metal Generation === | |
| + | Overdrive generates metal by increasing the income of mexes. Each mex spends energy individually and receives income according to the following formula: | ||
| − | + | <!--<code>Overdrive Metal = (Base Income) * (sqrt(energy)/4)</code>--> | |
| + | <var>Overdrive Metal</var> = <var>Base Income</var> × (√{{overline|<var>energy</var>}} / 4) | ||
| − | = Efficiency Tips = | + | For example, a mex with 2.2 base income and 4 overdrive energy generates <span style="white-space:nowrap">2.2 × (√{{overline|4}} / 4) = 1.1</span> overdrive metal. |
| − | Selecting an economy structure will show the effect fields of all | + | |
| + | == Efficiency Tips == | ||
| + | Selecting an economy structure will show the effect fields of all economy structures. The color of the field denotes its efficiency: runs from purple to red as it becomes increasingly inefficient; pink means unlinked. If a structure is disabled for any reason (EMP, for instance), it loses its pylon functionality; the field turns grey to indicate this. | ||
http://licho.eu/alba/Zero-K_Manual/pylongrid.sized.jpg | http://licho.eu/alba/Zero-K_Manual/pylongrid.sized.jpg | ||
| − | == Diminishing Returns == | + | === Diminishing Returns === |
The overdrive equation has diminishing returns. It takes 16 energy initially to double the income of a mex, and a further 64 energy (80 in total) to increase the output to triple its income. As a result, your metal to energy conversion ratio improves as more mexes are built and added to the grid. | The overdrive equation has diminishing returns. It takes 16 energy initially to double the income of a mex, and a further 64 energy (80 in total) to increase the output to triple its income. As a result, your metal to energy conversion ratio improves as more mexes are built and added to the grid. | ||
| − | For example, compare four +2 mexes in a grid to a single +2 mex, each in grids that have been allocated 16 energy. Each mex in the | + | For example, compare four +2 mexes in a grid to a single +2 mex, each in grids that have been allocated 16 energy. Each mex in the four-mex grid receives 4 energy, which overdrives them each by 50%. Therefore, the mexes each generate +1 overdrive metal, for a total of +4. The single mex receives 16 energy, so it is overdriven 100%, resulting in +2 overdrive metal. Spreading your overdrive, and thus your grid, between many metal extractors improves the efficiency of your overdrive. |
| − | In practice only about half of your extractors need to be linked to an overdrive grid for most games. The cost and risk of linking extra extractors can be too great for the minimal gain of linking an already efficient grid. It can be advantageous to construct a few small energy structures next to many of your mexes to take advantage of the highly efficient low levels of overdrive. | + | In practice, only about half of your extractors need to be linked to an overdrive grid for most games. The cost and risk of linking extra extractors can be too great for the minimal gain of linking an already efficient grid. It can be advantageous to construct a few small energy structures next to many of your mexes to take advantage of the highly efficient low levels of overdrive. |
[[File:Zero-K_Overdrive_Chart.png]] | [[File:Zero-K_Overdrive_Chart.png]] | ||
| − | == High Income Mexes == | + | === High Income Mexes === |
| − | Overdrive works by | + | Overdrive works by increasing base income, so metal spots with unusually high incomes are particularly important to overdrive. Such metal spots can be found in the center of many maps, which makes the task of overdriving them safely quite difficult. The overdrive equation has been solved to optimally distribute energy to the mexes that will yield the greatest income, so you never need to worry about connecting mexes with varying incomes to your grids. Try to capture metal spots with high income and overdrive them as much as possible. These extractors will max their grid sooner than others so make sure to keep track of their energy usage. |
| − | == Tooltips == | + | === Tooltips === |
The tooltips of Metal Extractors have information to display how efficient your overdrive is. For example: | The tooltips of Metal Extractors have information to display how efficient your overdrive is. For example: | ||
| − | : | + | :<samp>Metal Extractor - Makes:<var>X</var> + Overdrive: + <var>Y%</var> Energy:<var>Z</var></samp> |
| + | |||
| + | This shows the state of a single extractor. <var>X</var> is the base metal income of the extractor. <var>Y%</var> is the extra metal income from overdrive. <var>Z</var> is the energy used by this extractor to produce the extra <var>Y%</var> of income. | ||
| + | |||
| + | <var>Y</var> and <var>Z</var> are always related by <!--<code>Y = sqrt(Z)/4 x 100</code>--> | ||
| − | + | <var>Y</var> = 100 × √{{overline|Z}} / 4 | |
| − | Y | ||
| − | : | + | :<samp>E source - Extra Metal: <var>X</var> Energy <var>Y</var> / <var>Z</var></samp> |
| − | This shows the behaviour of the energy grid that the structure is part of. X shows the total extra metal produced due to overdrive in this grid. Y shows the total energy expended to produce this metal. Z shows the energy production of all the energy structures of the grid | + | This shows the behaviour of the energy grid that the structure is part of. <var>X</var> shows the total extra metal produced due to overdrive in this grid. <var>Y</var> shows the total energy expended to produce this metal. <var>Z</var> shows the energy production of all the energy structures of the grid. <var>Z</var> is the upper bound of <var>Y</var>. |
| − | == General Investment Payback Time == | + | === General Investment Payback Time === |
| − | The color coding on an energy grid is determined by the amount of energy required to make 1 metal. From this, you can roughly approximate how long it will take for | + | The color coding on an energy grid is determined by the amount of energy required to make 1 metal. From this, you can roughly approximate how long it will take for an energy structure to repay its metal cost in overdrive biased on grid color. These numbers are theoretical and not exact in a game environment, but a good guideline. |
[[File:Wiki_OD_chart.png]] | [[File:Wiki_OD_chart.png]] | ||
| − | = High-energy Weapons = | + | == High-energy Weapons == |
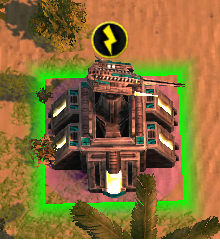
Some defense structures also require a connection to a grid in order to function (e.g. [[Cerberus]], [[Desolator]], [[Lucifer]]). The grid must have a minimum power output; however, any number of structures can use the same grid. | Some defense structures also require a connection to a grid in order to function (e.g. [[Cerberus]], [[Desolator]], [[Lucifer]]). The grid must have a minimum power output; however, any number of structures can use the same grid. | ||
| − | If a defense structure is not connected to a sufficiently powerful grid, an energy icon will display over it. | + | If a defense structure is not connected to a sufficiently powerful grid, an energy icon will display over it and the structure will not function. |
http://licho.eu/alba/Zero-K_Manual/nopower.png | http://licho.eu/alba/Zero-K_Manual/nopower.png | ||
{{Navbox manual}} | {{Navbox manual}} | ||
Revision as of 22:42, 16 August 2020
Overdrive is an ability of Metal Extractors that allows them to drain energy to increase their metal income. It uses a grid mechanic that is also required by some powerful defense structures to function.
Contents
Summary
- To view your energy grid, turn on the economy screen by pressing F4 (by default) or switching it in the top-left corner by clicking the
 Toggle Economy Display icon.
 - Circles around metal extractors and energy sources show their grid influence.
- Structures are in the same grid if their circles overlap.
- The unused energy income in a grid is sent to the connected Metal Extractors to increase their income.
- Grids between allies can be connected.
- The more energy a Metal Extractor uses, the less efficient the overdrive will be.
- Some weapons (Lucifer, Desolator, Cerberus) need a certain amount of grid energy to function.
Grid Expansion
- If a grid is pink or violet—Make sure you have some excess energy and connect Metal Extractors and energy structures together.
- If a grid is light blue or green—Keep adding energy.
- If a grid is yellow or red—The grid is inefficient. Spread out the energy by expanding the grid to connect more Metal Extractors.
Explanation of Overdrive
The energy grid consists of your energy structures, pylons, and metal extractors (mexes). Each mex and energy structure has an effect field; two structures are linked if their effect fields overlap. Linking economy structures together creates a grid; the energy produced in the grid is the maximum energy that can be used to overdrive all the mexes in the grid.
Energy Distribution
The energy available to overdrive is dependent on a team's energy storage, income and expenditure, according the following formula:
Energy for Overdrive = (income - expenditure) × (storage / capacity)
A team with full energy storage spends all of its excess energy on overdrive. Overdrive always costs energy, and does not occur if a team's expenditure exceeds its income. All the available energy is spent provided that there are sufficient grid connections. The total energy used by the metal extractors of a grid can never exceed the overdrive capacity of a grid. The total overdrive capacity of a grid is the summed energy income of each structure in that grid.
Metal Generation
Overdrive generates metal by increasing the income of mexes. Each mex spends energy individually and receives income according to the following formula:
Overdrive Metal = Base Income × (√energy / 4)
For example, a mex with 2.2 base income and 4 overdrive energy generates 2.2 × (√4 / 4) = 1.1 overdrive metal.
Efficiency Tips
Selecting an economy structure will show the effect fields of all economy structures. The color of the field denotes its efficiency: runs from purple to red as it becomes increasingly inefficient; pink means unlinked. If a structure is disabled for any reason (EMP, for instance), it loses its pylon functionality; the field turns grey to indicate this.

Diminishing Returns
The overdrive equation has diminishing returns. It takes 16 energy initially to double the income of a mex, and a further 64 energy (80 in total) to increase the output to triple its income. As a result, your metal to energy conversion ratio improves as more mexes are built and added to the grid.
For example, compare four +2 mexes in a grid to a single +2 mex, each in grids that have been allocated 16 energy. Each mex in the four-mex grid receives 4 energy, which overdrives them each by 50%. Therefore, the mexes each generate +1 overdrive metal, for a total of +4. The single mex receives 16 energy, so it is overdriven 100%, resulting in +2 overdrive metal. Spreading your overdrive, and thus your grid, between many metal extractors improves the efficiency of your overdrive.
In practice, only about half of your extractors need to be linked to an overdrive grid for most games. The cost and risk of linking extra extractors can be too great for the minimal gain of linking an already efficient grid. It can be advantageous to construct a few small energy structures next to many of your mexes to take advantage of the highly efficient low levels of overdrive.

High Income Mexes
Overdrive works by increasing base income, so metal spots with unusually high incomes are particularly important to overdrive. Such metal spots can be found in the center of many maps, which makes the task of overdriving them safely quite difficult. The overdrive equation has been solved to optimally distribute energy to the mexes that will yield the greatest income, so you never need to worry about connecting mexes with varying incomes to your grids. Try to capture metal spots with high income and overdrive them as much as possible. These extractors will max their grid sooner than others so make sure to keep track of their energy usage.
Tooltips
The tooltips of Metal Extractors have information to display how efficient your overdrive is. For example:
- Metal Extractor - Makes:X + Overdrive: + Y% Energy:Z
This shows the state of a single extractor. X is the base metal income of the extractor. Y% is the extra metal income from overdrive. Z is the energy used by this extractor to produce the extra Y% of income.
Y and Z are always related by
Y = 100 × √Z / 4
- E source - Extra Metal: X Energy Y / Z
This shows the behaviour of the energy grid that the structure is part of. X shows the total extra metal produced due to overdrive in this grid. Y shows the total energy expended to produce this metal. Z shows the energy production of all the energy structures of the grid. Z is the upper bound of Y.
General Investment Payback Time
The color coding on an energy grid is determined by the amount of energy required to make 1 metal. From this, you can roughly approximate how long it will take for an energy structure to repay its metal cost in overdrive biased on grid color. These numbers are theoretical and not exact in a game environment, but a good guideline.

High-energy Weapons
Some defense structures also require a connection to a grid in order to function (e.g. Cerberus, Desolator, Lucifer). The grid must have a minimum power output; however, any number of structures can use the same grid.
If a defense structure is not connected to a sufficiently powerful grid, an energy icon will display over it and the structure will not function.
| Basics | |
|---|---|
| Units | |
| Unit abilities and features | |
| Other features | |
| Other information | |
| Strategy | |
| Development/Modding | |