Difference between revisions of "User:DeinFreund"
DeinFreund (talk | contribs) |
DeinFreund (talk | contribs) |
||
| (One intermediate revision by the same user not shown) | |||
| Line 1: | Line 1: | ||
| − | / | + | http://licho.eu/alba/terraform/intro.png <div style="float:right;">__TOC__</div> |
| − | + | All construction units and Nano Turrets can modify the terrain in Zero-K. '''Terraforming''' costs energy, metal and time. | |
| − | + | == Terraform Types == | |
| − | |||
| − | |||
| − | |||
| − | |||
| − | |||
| − | |||
| − | + | There are 5 terraform commands found under the 'Special' tab in the menu: | |
| − | |||
| − | |||
| + | http://lh4.ggpht.com/_EUPLJBA3KD0/TRub7U_jT_I/AAAAAAAAAYk/koXIKuEWt_w/terrabuttons.jpg | ||
| − | + | * Ramp | |
| + | * Level | ||
| + | * Raise | ||
| + | * Smooth | ||
| + | * Restore | ||
| − | + | Note: ''Right Click'' at any time during the terraform will cancel the command (so will mousewheel movement, that's a bug though). | |
| − | |||
| − | |||
| − | |||
| − | |||
| − | |||
| − | |||
| − | |||
| − | |||
| − | |||
| − | |||
| − | |||
| − | + | Make sure you have the widget called "Lasso Terraform GUI" enabled or you will not be able to use Terraform. | |
| − | |||
| − | + | == Interface: Lasso Selection == | |
| − | |||
| − | |||
| − | |||
| − | |||
| − | |||
| − | + | Level, Raise, Smooth and Restore have the same interface for selecting the effected area. They differ in what they do to the terrain. | |
| − | . | ||
| − | |||
| − | |||
| − | |||
| − | |||
| − | / | + | http://lh3.ggpht.com/_EUPLJBA3KD0/TRuciWHaPMI/AAAAAAAAAYo/Zt1TFHER0lA/terrabuttons2.jpg |
| − | . | ||
| − | |||
| − | |||
| − | |||
| − | |||
| − | + | ''Left click'' on the ground and hold the mouse to start drawing a line. Drawing the area selects the area to be terraformed. If the end of the line is close to the start when the left mouse button is released the area inside the loop will be terraformed (like lasso selection), if the ends are far away the drawn line will be terraformed (good for making walls). | |
| − | |||
| − | / | + | http://licho.eu/alba/terraform/lasso.jpg |
| − | |||
| − | |||
| − | |||
| − | + | If you are using Smooth or Restore the command will be given when you release the mouse. If you are using Level or Raise you will have to chose either which height to level to or how much to raise the land. This is done by moving the mouse up/down then clicking when it looks like it is at the desired height. | |
| − | . | + | http://licho.eu/alba/terraform/setheight.jpg |
| − | + | === Effects of Terraform and Modifiers === | |
| − | + | Here are the effects of Level, Raise, Smooth and Restore. The modifiers ''Alt'' and ''Ctrl'' can be held during the Height Choosing phase of the Level and Raise commands for more height choosing control. | |
| − | |||
| − | + | http://licho.eu/alba/terraform/level.sized.jpg | |
| − | + | '''Level''' will move the terrain in the area to exactly the same height, the result terrain will be flat. For example a hill could be flattened. | |
| − | + | Hold ''Alt'' to snap to either the starting height, just below water level (so that ships can't pass) or the level just below water level that land units cannot pass (23 deep). | |
| − | + | Hold ''Ctrl'' and move the mouse to select the height to be levelled to from terrain by mousing over the terrain. | |
| − | |||
| − | |||
| − | |||
| − | |||
| − | |||
| − | + | Tap ''Space'' to cycle through only raise or only level. This limits the terraform to either take away or add terrain instead of a mix of both. Can be toggled during lasso stage. | |
| − | |||
| − | |||
| − | + | http://licho.eu/alba/terraform/raise.sized.jpg | |
| − | |||
| − | |||
| − | |||
| − | |||
| − | |||
| − | |||
| − | |||
| − | + | '''Raise''' raises or lowers the terrain in the area by the same amount, the relative height of the terrain within the area is not changed. | |
| − | |||
| − | |||
| − | + | Hold ''Alt'' to snap to heights by steps of 15. A 15 high (or deep) wall (or trench) will be impassable to vehicles but passable to bots. A 18 high wall will be impassable to most common bots. A 30 high wall will be impassable to everything except spiders. | |
| − | |||
| − | |||
| − | + | Press ''Ctrl'' to reset the height to 0. | |
| − | |||
| − | |||
| − | . | + | <img src="http://licho.eu/alba/terraform/smooth1.sized.jpg" width="360"/><img src="http://licho.eu/alba/terraform/smooth2.sized.jpg" width="360"/> |
| − | |||
| − | |||
| − | |||
| − | |||
| − | + | '''Smooth''' smooths the terrain, cliffs become less sharp. | |
| − | |||
| − | |||
| − | |||
| − | |||
| − | |||
| − | / | + | <img src="http://licho.eu/alba/terraform/restore1.sized.jpg" width="360"/><img src="http://licho.eu/alba/terraform/restore2.sized.jpg" width="360"/> |
| − | . | ||
| − | . | ||
| − | . | ||
| − | + | '''Restore''' reverts the height of the terrain to what it was at the start of the game. | |
| − | |||
| − | |||
| − | |||
| − | |||
| − | |||
| − | |||
| − | + | Tap ''Space'' to cycle through only raise or only level. This limits the terraform to either take away or add terrain instead of a mix of both. Toggle during lasso stage. | |
| − | |||
| − | |||
| − | |||
| − | |||
| − | |||
| − | |||
| − | |||
| − | |||
| + | == "Advanced" Area Selection == | ||
| − | / | + | For easier terraforming, alt and/or ctrl can be used to modify the way the lasso command is given. |
| − | |||
| − | + | Hold ''Alt'' while clicking to terraform a rectangular area. | |
| − | |||
| − | |||
| − | |||
| − | / | + | http://licho.eu/alba/terraform/square.jpg |
| − | / | ||
| − | |||
| − | |||
| − | |||
| − | |||
| − | |||
| − | |||
| − | |||
| − | a | + | Hold ''Alt'' and click on a building or unit to create a wall around that unit. |
| − | |||
| − | + | http://licho.eu/alba/terraform/autowall.sized.jpg | |
| − | |||
| − | a | + | Hold ''Alt'' + ''Ctrl'' while clicking to create a hollow rectangle of terraform. |
| − | |||
| − | / | + | http://licho.eu/alba/terraform/ring.sized.jpg |
| − | |||
| − | |||
| − | |||
| − | + | Hold ''Ctrl'' at any time during line drawing to create a straight section of line. Straight and non-straight lines can be mixed by pressing and releasing Ctrl. | |
| − | |||
| − | |||
| − | |||
| − | |||
| − | |||
| − | |||
| − | / | + | http://licho.eu/alba/terraform/loopy.sized.jpg |
| − | / | ||
| − | + | === Ramp === | |
| − | |||
| − | |||
| − | |||
| − | |||
| − | |||
| − | |||
| + | The ramp command interface is different from that of the other terraform commands. | ||
| − | + | First select the Ramp command from the command menu. | |
| − | |||
| − | |||
| − | |||
| − | |||
| − | |||
| + | http://lh3.ggpht.com/_EUPLJBA3KD0/TRucnab2grI/AAAAAAAAAYs/N9DPLGOiYU0/terrabuttons3.jpg | ||
| − | + | == Simple Ramp == | |
| + | This is a simple way to make a ramp between 2 points on the ground. It uses exactly the same interface as advanced ramp but it can be unclear how to make a simple ramp just from the explanation of the full features of advanced ramp. | ||
| − | + | In short: | |
| + | * ''Left Click'' the start of the ramp | ||
| + | * ''Left Click'' the end of the ramp | ||
| + | * ''Left Click'' again | ||
| − | + | == Advanced Ramp == | |
| + | Using the full ramp interface you can make a ramp between any 2 arbitrary points above or below the terrain and chose the width of this ramp. | ||
| − | . | + | ''Left Click'' on the ground to set the start of the ramp. '''If''' you want to choose the height of the start of the ramp hold the click and move the mouse up or down. A little green line will appear out of the ground to indicate the height. The default height is the ground height, release the mouse to select the height. |
| − | |||
| − | |||
| − | |||
| − | |||
| − | |||
| − | |||
| − | |||
| − | |||
| − | |||
| − | |||
| − | |||
| − | |||
| − | |||
| − | |||
| − | |||
| − | |||
| − | |||
| − | |||
| − | |||
| − | . | + | Hold '''Alt''' when choosing the start height to snap to the original ground height or just below water level(helpful for getting hovers out of the water). |
| − | |||
| − | |||
| − | |||
| − | |||
| − | / | + | <img src="http://licho.eu/alba/terraform/ramp1.sized.jpg" width="480"/> |
| − | |||
| − | . | + | Then ''Left Click'' on the ground to set the end of the ramp. As with the start of the ramp, you can hold the mouse and move to choose the height. |
| − | |||
| − | |||
| − | |||
| − | |||
| − | |||
| − | |||
| − | |||
| − | |||
| − | |||
| − | |||
| − | |||
| − | |||
| − | |||
| − | |||
| − | |||
| − | |||
| − | |||
| − | |||
| − | |||
| − | |||
| − | |||
| − | |||
| − | |||
| − | . | + | Hold '''Alt''' when choosing the end height to snap the gradient of the ramp to either upwards bot pathable, upwards vehicle pathable, flat, downwards vehicle pathable, downwards bot pathable, the original ground height or just below water level . |
| − | |||
| − | |||
| − | |||
| − | |||
| − | |||
| − | |||
| − | |||
| − | |||
| − | |||
| − | |||
| − | |||
| − | + | <img src="http://licho.eu/alba/terraform/ramp2.sized.jpg" width="480"/> | |
| − | |||
| − | |||
| − | / | + | Move the mouse up/down (not held down) and click to set the width of the ramp. Then ''Left Click'' to build it. |
| − | |||
| − | |||
| − | |||
| − | |||
| − | |||
| − | |||
| − | |||
| − | |||
| − | |||
| − | |||
| − | |||
| − | |||
| − | |||
| − | |||
| − | |||
| − | |||
| − | |||
| − | |||
| − | |||
| − | |||
| − | |||
| − | |||
| − | |||
| − | |||
| − | |||
| − | |||
| − | |||
| − | |||
| − | |||
| − | |||
| − | |||
| − | |||
| − | |||
| − | |||
| − | |||
| − | |||
| − | |||
| − | |||
| − | |||
| − | |||
| − | |||
| − | |||
| − | |||
| − | |||
| − | |||
| − | |||
| − | |||
| − | |||
| − | |||
| − | |||
| − | |||
| − | |||
| − | |||
| − | |||
| − | |||
| − | |||
| − | |||
| − | |||
| − | |||
| − | |||
| − | |||
| − | |||
| − | |||
| − | |||
| − | |||
| − | |||
| − | |||
| − | |||
| − | |||
| − | . | ||
| − | . | ||
| − | |||
| − | |||
| − | |||
| − | + | <img src="http://licho.eu/alba/terraform/ramp3.sized.jpg" width="480"/> | |
| + | |||
| + | The ramp colour indicates whether all units will be able to use it, if vehicles/tanks will not be able to use it and if only Spiders can use it. | ||
| + | |||
| + | <img src="http://licho.eu/alba/terraform/ramp_green.jpg" width="240"/><img src="http://licho.eu/alba/terraform/ramp_yellow.jpg" width="240"/><img src="http://licho.eu/alba/terraform/ramp_red.jpg" width="240"/> | ||
| + | |||
| + | Optional: Tap ''Space'' to cycle through only raise or only level. This limits the terraform to either take away or add terrain instead of a mix of both. Can be toggled at any stage during the ramp command. | ||
| + | |||
| + | === Cost === | ||
| + | |||
| + | Terraform by default costs 1 metal, energy and build power to raise or lower 1 heightmap grid, each vertex of the blue grid maps onto a point on the heightmap grid. Due to the sloped sides it will be costly to make a very high spire. Equal volumes of terraform will have the same cost regardless of shape. Cost can be changed with the "terraform cost multiplier" ModOption. | ||
| + | |||
| + | As a general guideline, assuming the base value for terraforming cost, creating a 15 deep wall (or trench) will cost roughly 19 resources per 'segment'. | ||
| + | |||
| + | === Tips === | ||
| + | |||
| + | You can protect non-combat structures not sensitive to terrain such as cloak/shield generators, nanoturrets, gunship factories and missile silos with walls or holes. | ||
| + | |||
| + | Buildings cannot be moved vertically. If you want to put a Fusion in a hole for safety the hole will have to be built before the Fusion. | ||
| + | |||
| + | Because buildings cannot move vertically they can be used to stop walls being terraformed by the enemy. | ||
| + | |||
| + | http://licho.eu/alba/terraform/cappedwall.sized.jpg | ||
| + | |||
| + | Big Berthas and Crabes are very good at knocking down walls. | ||
| + | |||
| + | http://licho.eu/alba/terraform/crabesmooth.sized.jpg | ||
| + | |||
| + | You can use Terraforming to make a trench or wall underwater to stop amphibious bots. | ||
| + | |||
| + | Terraform ramp can be used with newtons to fire units at the enemy! | ||
| + | |||
| + | http://licho.eu/alba/terraform/newtonramp.sized.jpg | ||
| + | |||
| + | To set hotkeys for terraform commands, navigate into the game menu and look under hotkeys for ''Levelground, Raiseground, Rampground, Smoothground'' and ''Restoreground.'' | ||
| + | |||
| + | {{Navbox manual}} | ||
Latest revision as of 07:40, 27 June 2016

All construction units and Nano Turrets can modify the terrain in Zero-K. Terraforming costs energy, metal and time.
Terraform Types[edit]
There are 5 terraform commands found under the 'Special' tab in the menu:

- Ramp
- Level
- Raise
- Smooth
- Restore
Note: Right Click at any time during the terraform will cancel the command (so will mousewheel movement, that's a bug though).
Make sure you have the widget called "Lasso Terraform GUI" enabled or you will not be able to use Terraform.
Interface: Lasso Selection[edit]
Level, Raise, Smooth and Restore have the same interface for selecting the effected area. They differ in what they do to the terrain.

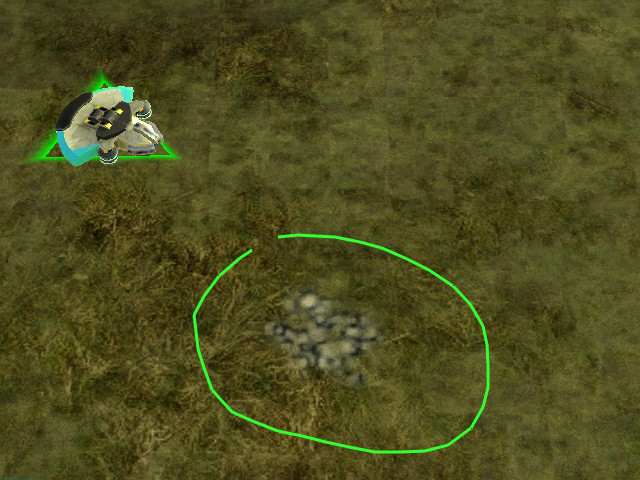
Left click on the ground and hold the mouse to start drawing a line. Drawing the area selects the area to be terraformed. If the end of the line is close to the start when the left mouse button is released the area inside the loop will be terraformed (like lasso selection), if the ends are far away the drawn line will be terraformed (good for making walls).
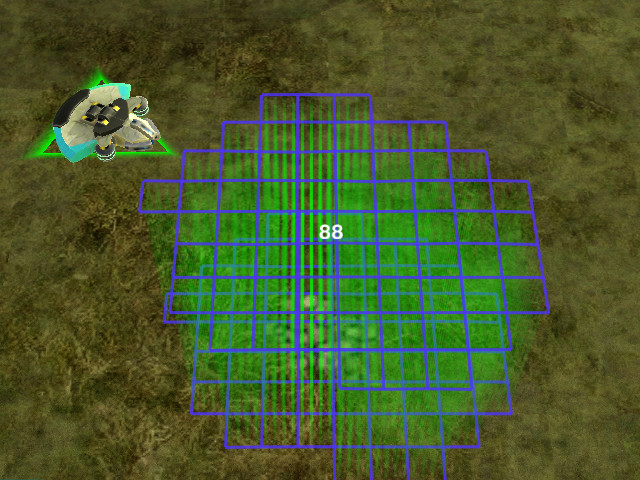
If you are using Smooth or Restore the command will be given when you release the mouse. If you are using Level or Raise you will have to chose either which height to level to or how much to raise the land. This is done by moving the mouse up/down then clicking when it looks like it is at the desired height.
Effects of Terraform and Modifiers[edit]
Here are the effects of Level, Raise, Smooth and Restore. The modifiers Alt and Ctrl can be held during the Height Choosing phase of the Level and Raise commands for more height choosing control.

Level will move the terrain in the area to exactly the same height, the result terrain will be flat. For example a hill could be flattened.
Hold Alt to snap to either the starting height, just below water level (so that ships can't pass) or the level just below water level that land units cannot pass (23 deep).
Hold Ctrl and move the mouse to select the height to be levelled to from terrain by mousing over the terrain.
Tap Space to cycle through only raise or only level. This limits the terraform to either take away or add terrain instead of a mix of both. Can be toggled during lasso stage.
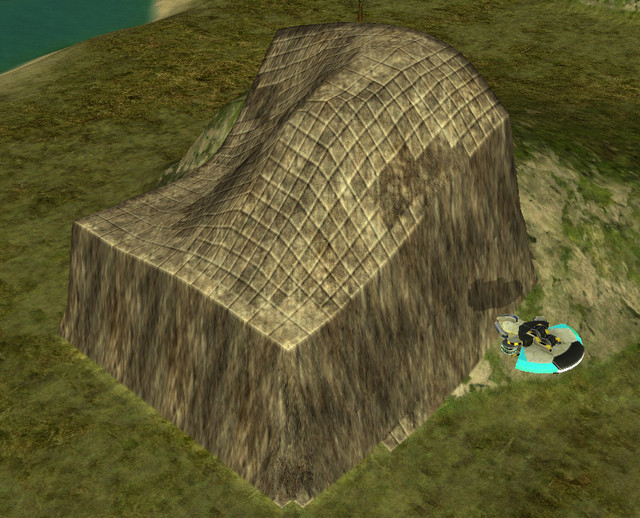
Raise raises or lowers the terrain in the area by the same amount, the relative height of the terrain within the area is not changed.
Hold Alt to snap to heights by steps of 15. A 15 high (or deep) wall (or trench) will be impassable to vehicles but passable to bots. A 18 high wall will be impassable to most common bots. A 30 high wall will be impassable to everything except spiders.
Press Ctrl to reset the height to 0.
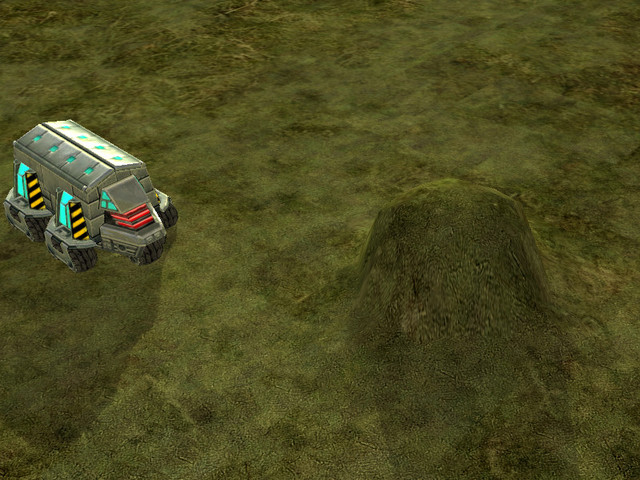
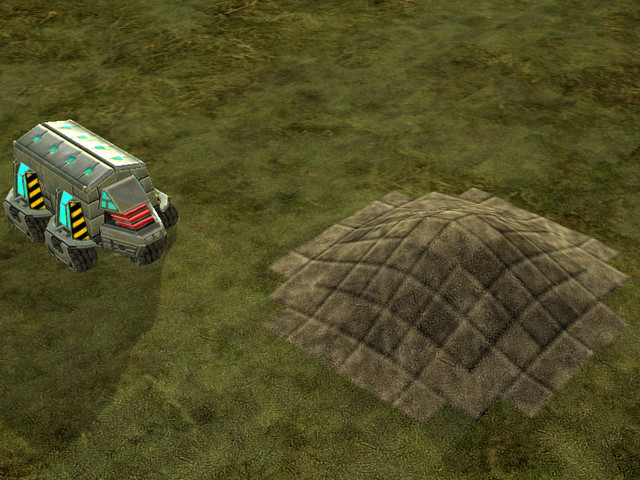
Smooth smooths the terrain, cliffs become less sharp.
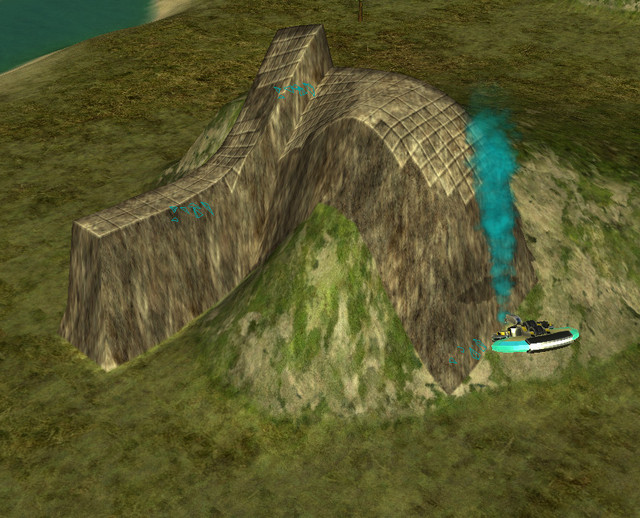
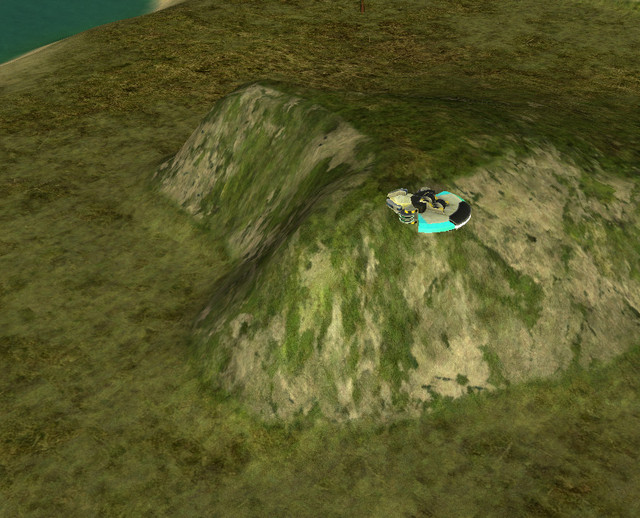
Restore reverts the height of the terrain to what it was at the start of the game.
Tap Space to cycle through only raise or only level. This limits the terraform to either take away or add terrain instead of a mix of both. Toggle during lasso stage.
"Advanced" Area Selection[edit]
For easier terraforming, alt and/or ctrl can be used to modify the way the lasso command is given.
Hold Alt while clicking to terraform a rectangular area.

Hold Alt and click on a building or unit to create a wall around that unit.
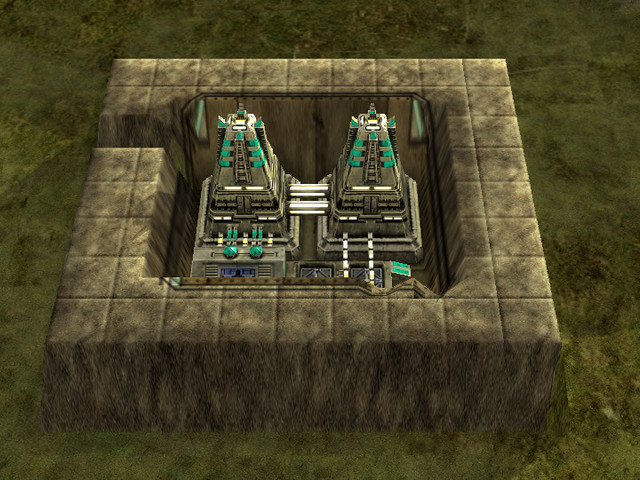
Hold Alt + Ctrl while clicking to create a hollow rectangle of terraform.
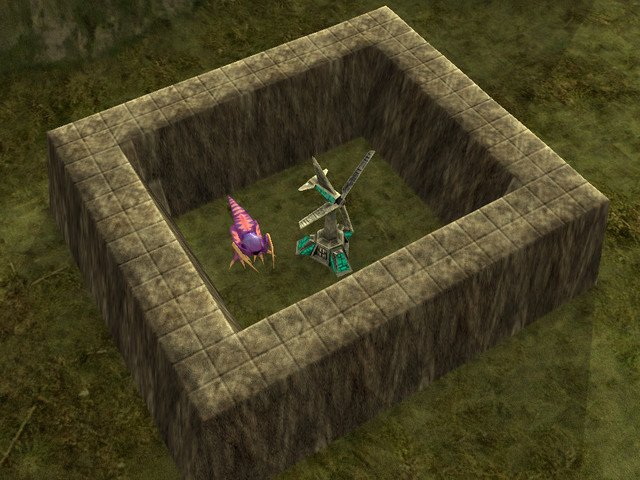
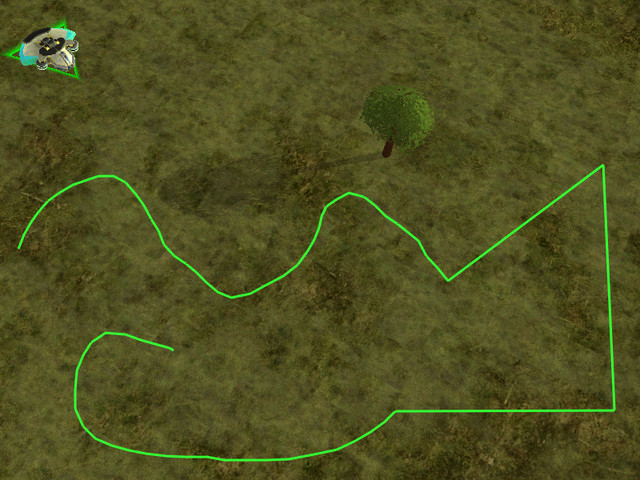
Hold Ctrl at any time during line drawing to create a straight section of line. Straight and non-straight lines can be mixed by pressing and releasing Ctrl.
Ramp[edit]
The ramp command interface is different from that of the other terraform commands.
First select the Ramp command from the command menu.

Simple Ramp[edit]
This is a simple way to make a ramp between 2 points on the ground. It uses exactly the same interface as advanced ramp but it can be unclear how to make a simple ramp just from the explanation of the full features of advanced ramp.
In short:
- Left Click the start of the ramp
- Left Click the end of the ramp
- Left Click again
Advanced Ramp[edit]
Using the full ramp interface you can make a ramp between any 2 arbitrary points above or below the terrain and chose the width of this ramp.
Left Click on the ground to set the start of the ramp. If you want to choose the height of the start of the ramp hold the click and move the mouse up or down. A little green line will appear out of the ground to indicate the height. The default height is the ground height, release the mouse to select the height.
Hold Alt when choosing the start height to snap to the original ground height or just below water level(helpful for getting hovers out of the water).
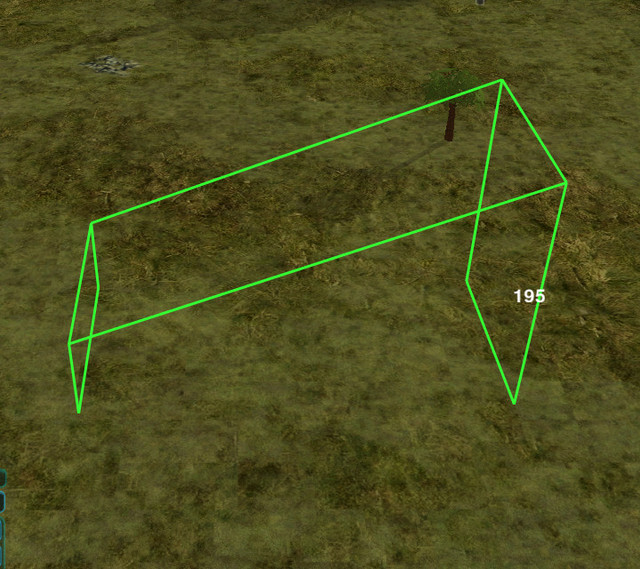
Then Left Click on the ground to set the end of the ramp. As with the start of the ramp, you can hold the mouse and move to choose the height.
Hold Alt when choosing the end height to snap the gradient of the ramp to either upwards bot pathable, upwards vehicle pathable, flat, downwards vehicle pathable, downwards bot pathable, the original ground height or just below water level .
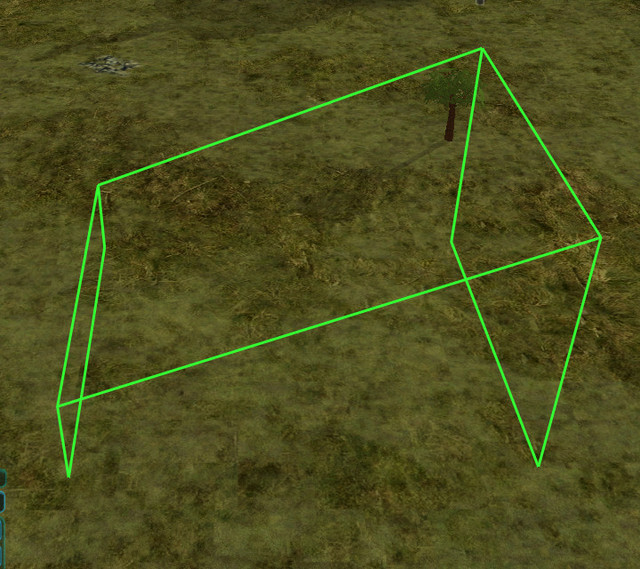
Move the mouse up/down (not held down) and click to set the width of the ramp. Then Left Click to build it.
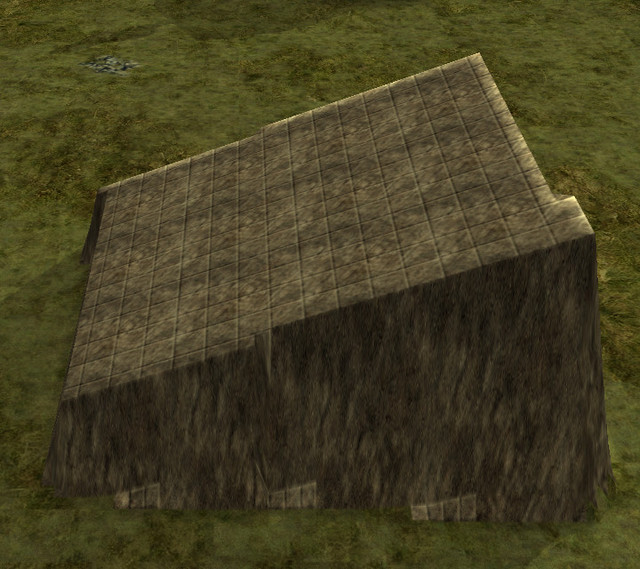
The ramp colour indicates whether all units will be able to use it, if vehicles/tanks will not be able to use it and if only Spiders can use it.
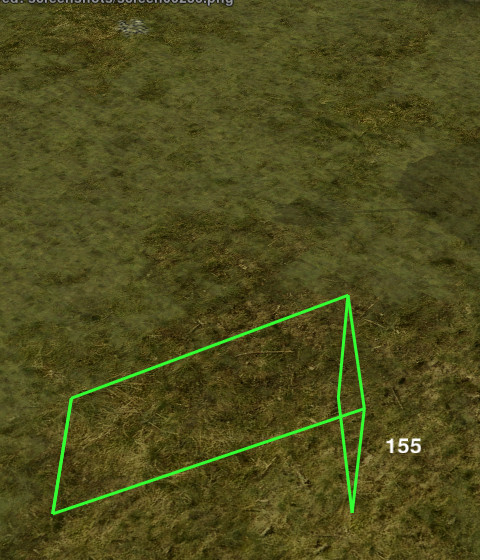
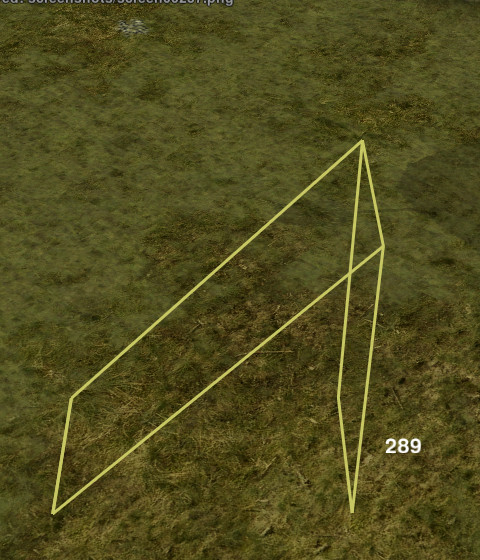
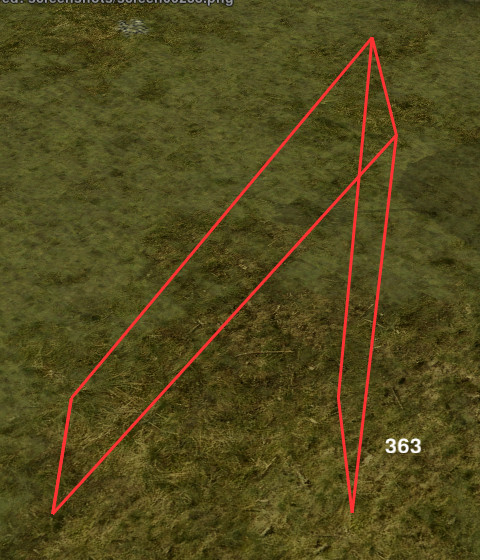
Optional: Tap Space to cycle through only raise or only level. This limits the terraform to either take away or add terrain instead of a mix of both. Can be toggled at any stage during the ramp command.
Cost[edit]
Terraform by default costs 1 metal, energy and build power to raise or lower 1 heightmap grid, each vertex of the blue grid maps onto a point on the heightmap grid. Due to the sloped sides it will be costly to make a very high spire. Equal volumes of terraform will have the same cost regardless of shape. Cost can be changed with the "terraform cost multiplier" ModOption.
As a general guideline, assuming the base value for terraforming cost, creating a 15 deep wall (or trench) will cost roughly 19 resources per 'segment'.
Tips[edit]
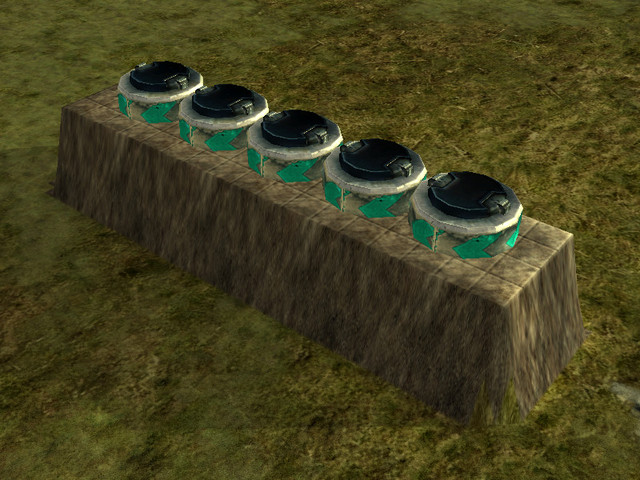
You can protect non-combat structures not sensitive to terrain such as cloak/shield generators, nanoturrets, gunship factories and missile silos with walls or holes.
Buildings cannot be moved vertically. If you want to put a Fusion in a hole for safety the hole will have to be built before the Fusion.
Because buildings cannot move vertically they can be used to stop walls being terraformed by the enemy.
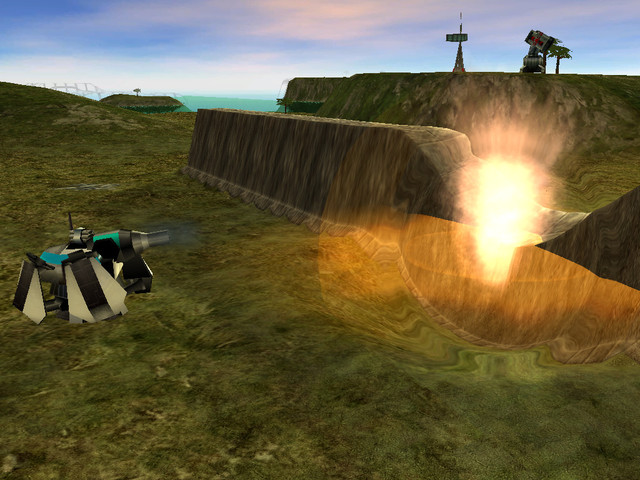
Big Berthas and Crabes are very good at knocking down walls.
You can use Terraforming to make a trench or wall underwater to stop amphibious bots.
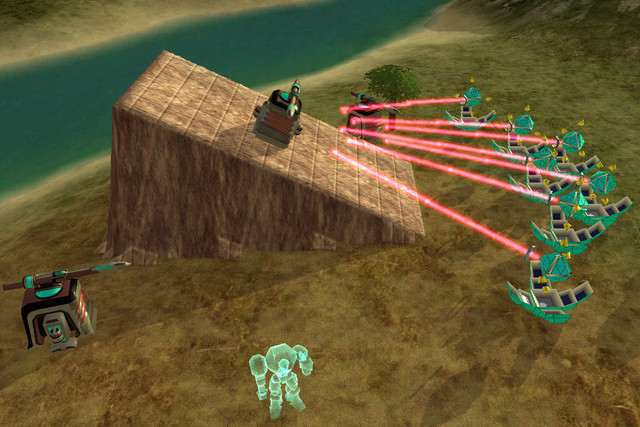
Terraform ramp can be used with newtons to fire units at the enemy!
To set hotkeys for terraform commands, navigate into the game menu and look under hotkeys for Levelground, Raiseground, Rampground, Smoothground and Restoreground.